Monday, December 27, 2010

Fabric Clocks

Now I can post on what I've been sewing on for the past few months.  It all started when I bought a Quilting Arts Stitch Fall 2010    magazine and I seen a perfect gift on page 71:  a fabric clock.  I quickly found out what colors would look nice in my sister's sewing rooms.  The pictures below are my results.

The last two pictures are the backs of the quilted fabric before I mounted them on a frame.


Both of my sisters were delighted with the results.  It has been hard to keep this a secret.  I also done some exploring on internet and the designer of this great pattern is Linda Graham  of Soft Clox.  While you are on her web site, please check out all her wonderful clock patterns.
Thank you Linda for letting me share pictures of your design.  You will be hearing from me as soon as I can make up my mind which clock I want to make for in my sewing room.  

I just have to share the postcard that we received from my sister a few years ago.
The snowman just makes me smile even though I don't really like the cold :)


 Have a Happy New Year!


Happy Quilting

Kay Lynne

Monday, December 20, 2010

My New Sewing Room and I'm Proud of My Sis

This last week I've been slowly moving in my sewing room.  This is my cutting table and the wall on the right will be a design wall.  I haven't had time to make it, but that is the plan.  All extra scissors and razor blade knives are in the glass mug.  Rotary cutters are in the basket on the table.  DVD's are in a basket.  Quilt rulers all have a special place.  I don't have a storage plan for scraps yet, but there will be when I'm finished.  If you have any ideas for storage on scraps that are smaller than a fat quarter that would look great on a small shelf, I would appreciate it.


The space of this room is more than doubled from my old sewing room.  I had grafted out all my furniture on graft paper and played around with ideas for several months before I came up with something that is workable.  My serger table can also be used as a pressing and cutting table.


One corner has all my books and magazines.  My husband thinks that I should scan off all the magazines and store them on DVD, but I still like having a magazine to curl up in bed to look at.  The small cabinet with all the drawers was bought over 15 years ago to store all my sewing notions.  It's a pretty convenient place to store buttons, thread, needles, and anything else that is small.


This cabinet below was refinished this summer and I tiled the door.  I'm using it to store cone thread.


 After the holidays, Dean is going to install a new closet door so my fabric won't fade.  


 Over 25 years ago my grandfather built my sewing cabinet.  It comes in three sections.  Both of the side sections have three large drawers.  The center holds my machine and there's also a hutch for open storage and display.  The racks on the side for serger thread are really convenient, but are dust catchers.  I've thought about putting some clear plastic over the cones, but haven't made a decision yet.


I've become used to having a bulletin board in front of where I work.  It's convenient to hang patterns where I can see them.  I also hung my small quilting rulers where I can see them.  If they are in my site, they will be used!


The only new piece of furniture I bought was this ottoman.  It opens up for storage and also is nice for hubby to sit down on when he wants to see what I'm up to.


I've had this storage cube for a long time, but wanted to show you how I use it to store my dress patterns and long rulers.  It's amazing how some little hooks can make life so much easier.  Before I had a place to hang quilting rulers, I would spend a lot of wasted time looking for them.  Now everything has a special place so I can find it when I need it. 


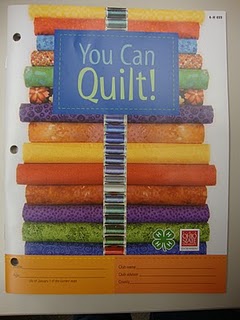
My younger sister is a co-author of a new Ohio 4-H Quilting Project Book!  What an amazing project!  I'm so happy that the kids in Ohio have a project book to get them started.  I can't wait to have the hard copy in my hands!  I had the honor of proofreading the rough draft :)  We all need to remember to teach the younger generation our quilting skills and build wonderful relationships along the way.


I just have to say:
I'm so proud of my sis!
She is nine years younger than I am and I have sweet memories of Jen and me at Mom's 201 Singer working on 4-H projects.  She can tell you how I made her sew every seam herself with my supervision when Mom couldn't be there.  Now she does great things with her sewing machine!
Congratulations to everyone that helped put this project book together!

Happy Quilting & Merry Christmas!

Kay Lynne

Monday, December 13, 2010

My New Sewing Room is Almost Ready!


My husband is very busy at work putting up woodwork for me.  He has even found that my Ott-Lite works great when things are a little dark.  I'm wondering if I will have to hide my light in the near future?  Dean has found that he likes quite a few of my quilting tools since we've been remodeling.  He has even been known to "borrow" my quilt rulers.  So to fix that problem--I bought him a new tape measure :) 


I never thought that trying to find a stud in the wall would be so difficult!  We even had a high tech stud finder and I think it was confused.  We had drilled 4 holes before we found a stud.  The low tech method ended up helping us find a stud.  Dean fished a bent bailing wire through the wall and eventually figured out where the stud was located.  We were only off an inch--so close, but so far!


So that is what we did on a snowy Sunday afternoon.  I've been working on Christmas presents and will be posting on them after Christmas.
  Sorry Jenny and Emily--you will have to wait to find out what I've been working on  :)


Happy Quilting!

Kay Lynne

Monday, December 6, 2010

Free Motion Fun: Meandering, Leaves, and Feathers


I spent some time this weekend getting caught-up with the Free Motion Quilt along.  Meandering is a fun way to fill a quilt, but Christina has me thinking outside the box.  Why not cross the lines, add loops, and just have fun!  How about adding stars!  My sister added stars in her meandering.  Great job Jenny :)


Below is another idea from Christina.  It reminds me of water.


 I also practiced leaves. Leaves are a little hard for me because I never can get the shape I'm looking for, but they're still fun to try.  They can also be used as background filler with a little practice.


Here is one of Christina's patterns that I modified just a little bit.  Instead of traveling back on the curls, I trailed back making it look more like ribbon.  The options are endless!


The last but not least is feathers.  I have been practicing feathers for a long time on small projects and just drawing them in my sketch book.  Christina has more ideas on her leaves and feathers post.


Below is my feather.  I haven't tried a border before--it was fun :)
If you want to learn how I do feathers, check out my tutorial on drawing feathers.  Hint on feathers below:  I started with the feather at the bottom.  Yes--I chalked in a curvy line.  The rest I filled in without lines.  To start the next feather I traveled through the stitching to my chalk line.


In this busy time of year please take time to reflect on the important things in life, spend time with family, and don't forget there are others that need our help.  Have a wonderful week!


Happy Quilting
Kay Lynne

Monday, November 29, 2010

Rewiring--What an Adventure!?#

Our remodeling project is slowly coming along.  We decided that four outlets with three prongs instead of two prongs would be a good thing for in my sewing room.  Fishing wiring through walls can be an interesting adventure and messy.  This project should have been done before we had insulation blown in the walls, but it was very hot this summer and I didn't want Dean working in a hot attic stringing wire.  Oh well--what's done is done :)  

Even though it's a pain, it's worth having safe wiring in the house.  Once we're done with my sewing room, two out of the four rooms upstairs will have new wiring.  When you live in a 110 year old house, the wiring can be extremely interesting.  People through the years have added on outlets and ceiling lights so when you trip a breaker it can be connected to several different rooms--an outlet upstairs, a ceiling light downstairs, ect.  I think you're getting the picture.  When we first moved in 28 years ago, my Uncle Bob was wonderful.  He replaced the old fashioned fuse box with a new breaker box.  Now we think it's a good idea to replace the wiring and try to have one breaker per room.  The wiring is probably 40 years old.  One thing I have overcome was the fear of sticking my arm in the wall and trying to find the wire that Dean was fishing up through the layers of insulation from downstairs.  He does have a sense of humor with me as his helper.  I'm trying to find the wire and getting more frustrated by the moment.  He comes up and sticks his hand in the wall and pulls out the wire with a silly grin on his face :)  I was looking in the opposite direction.


 Pictured above is a pillow that I made many years ago for a kid's quilting class.  It's sort of flat and old, but a great cushion for the knees when you're kneeling on the floor.  Just in case you're interested--the wiring on the right is the old wiring and on the left is the new.  The new has a ground wire.


This room has subflooring so we didn't have to fish it through the wall, but through the little canal which the woodwork will be nailed above.  I'm thinking about gluing the quarter round to the wood trim.  We don't need any nails accidently hitting wiring!  If it wasn't for my husband, I would have hired someone to do electrical wiring.  It can be extremely dangerous if you don't know what you're doing.
  My expertise is in quilting!


There is one thing for sure.  If you and your husband can do a wiring project together and still have a solid marriage afterwards, you're doing great :)  Dean is up in the attic and he wants me to screw on the nut that is on the left side in the picture below.  It just wouldn't screw on.  I think I dropped it three or four times.  Finally we did get it together!!!  I'm just not cut out for this type of work.


Now I know why I'm a quilter and not an electrician.

Happy Quilting!!!

Kay Lynne

Saturday, November 20, 2010

Friday Night Sew-In Results


There was no sewing going on for my Friday Night Sew-In, but I had fun cutting out I Spy blocks.  Check out the fabric above.  What a fun fabric!!!


I spy dolphins!  I spy a cow!  I spy a pig!
No I'm not crazy, just a child at heart :)


The farm animals were fun to cut.  I tried to cut the squares so there were more than one animal in a block.


Yesterday was an extremely long day at the bakery working on a fall wedding cake.  This cake taught me patience and "no" you can't hurry tiny flowers! 


Thanksgiving is next week!  Hope everyone has a wonderful holiday!


Happy Quilting!

Kay Lynne

Sunday, November 14, 2010

Grandpa's Hammer, Old Sewing Room, and I Spy

You would be so proud of me.  I put up wood trim strips all by myself in my sewing room closet doorway.  It's not perfect, but it will work.  Sometime in the next few months I will shop for a new closet door.  I would rather keep the old, but the old door opened into the closet, which takes away closet space.  Also if you have small children, it's not the best plan because closet clutter can trap a child inside the closet and it's a terrible when you cannot open the door and the child is trapped inside!  We talked our son out and he now has quite a story to tell his kids someday.

My Grandpa not only farmed, but he also was a carpenter.  He loved making furniture and small items for anyone who asked.  He only charged for the supplies and never for his time or labor.  Our family has quite a bit of furniture that he has made.  I think that there is something that he has made in every room in our house.  Eventually, age and cancer took Grandpa to a better place.  There are little things like his hammer that makes me smile.  My Mom and Dad had given it to me for a keepsake and I actually use it once in a while. 


I installed some little shelves that were leftover pieces from the closet organizer that weren't needed.  So for the time being I put little cute items on the shelves just for fun.  Cone thread would also fit nicely.   I like the idea of making every inch of my closet useful.


I wanted to thank all you for such nice comments on my new closet, but I wanted you to know that as a quilting artist things can get messy and unorganized and that is okay :)


My old sewing room is still intact.  There are always several projects going on and I don't always have my sewing room in perfect order.


 Just wanted to show you that I'm working on being organized just like you
Or maybe you should be giving me advice!


 Sandi is having an I Spy Swap.  If you want to join us, please let Sandi know as soon as possible.


The weather has been beautiful this last week and warm for this time of year.


Happy Quilting

Kay Lynne

Monday, November 8, 2010

New Sewing Room Closet

Last weekend Dean was busy doing a fix it job and I was more or less in the way so I decided to install the rest of the laminate flooring in my sewing room closet.  I finished without any problems!  We still have about four more rows to do on the main floor.  It's a two person job so I'll have to wait until Dean and I can work on it together.  This week I worked on installing my closet organizer.  I know closet organizers aren't cheap, but Dean just doesn't have time to build one for me and it's cheaper than hiring someone to do it.
Last night I started organizing and moving my fabric in.


I found these wall racks at Menards.  They fit fat quarters just perfect!


This fabric I've accumulated over the last 25 years.  Some of it was given to me, but a lot of it I bought.  Now that my sons are grown and moved out, I hope to have more time to spend on sewing it up.


I even installed small shelves to fill in a small area so every inch of my closet will be in use.  Dean showed me how to safely run the table saw to cut the shelves.  I'd rather run a sewing machine than a saw.  I have a few more really small shelves I'll be installing and some hooks to hang quilt rulers.  I like everything to have its place so I can find it when I need it.


I've sorted my fabric by color, project, kind of fabric, and amount of fabric.  It probably wouldn't make any common sense to anyone, but me.  Anyway it's organized so I can find what I need.  If you want to use up that beautiful sales fabric, I have a suggestion that has really helped.


Fabric yardage that is one yard or more is rolled onto my 8 1/2" x 24" ruler, which is about the size of a bolt of fabric.  The ruler is slid out and I safety pin the amount of the yardage on the left side.  Please be sure to use the type of safety pin that doesn't rust.  Have the fabric stored where you can see it.  I like to see my fabric for inspiration, but also I don't want it fading on me so that is why it's in a closet.  My husband will be installing a new door so the fabric will be protected from fading.


My fat quarters are rolled onto my 6" x 24" ruler and folded in half again.  I found these cheap plastic containers at Wal-Mart to store some of my fat quarters until I find a better idea.
 Hope everyone is having a nice fall season.  Below are some cookies that I decorated about two weeks ago for the bakery that I work at.


It's really a joy to see little and big kids smile at our pumpkin faces.  Isn't that what life's all about making people smile!  I think that's why we all love to quilt!  Have a wonderful week and enjoy looking at all the beautiful quilts on Blogger's Quilt Festival.  Also thank you for all the nice comments on my Grandmother's Fan Quilt.


Happy Quilting!

Kay Lynne